The Sims 3 – Create A World pt2
 As you’ve probably noticed, creating a world is quite time consuming. If you at least made a start on the steps in part one you’ll see how helpful they are as you start using CAW to bring your world into being.
In part one we went over getting inspired and knowing if the inspiration is usable. We also looked at creating a (hi)story for your world, and perhaps integrating the above steps into drawings. These drawings will help you stay on target, steam ahead, and remember all the little things you wanted. This is important because creating a world isnt always something you can do in a few hours – so drawing and writing your ideas will help you remember through time. It will also help you once you start seeing your world take shape in CAW, because I can guarantee you’re going to start making up new stories and plans as you go! Perhaps because it will get your creative juices flowing, or because you encountered a hurdle. Either way, it will happen and you might want to record it – having drawings allows you to edit them directly or put notes on them.
How to CAW Like A Crow
Since you’re familiar with the game, now it’s time to get familiar with CAW!
Figure Out How CAW Works
If you can’t use it, you can’t make your vision become a world. The Sims 3 Create a World section links to the manual which will help you figure out what each tool does. Beyond that you can also ask on a forum. I recommend Mod The Sims because they’re helpful, friendly, and fast to respond. It’s also easier to keep track of things there than on The Sims 3’s community. One of the most helpful things I learned on MTS was how to speed up the scrolling speed of CAW (I hold the left mouse button down, use the arrow keys, and move my mouse in the direction I want).
Play around and get used to the options. For example, see what happens when you change the strength/opacity and falloff. Sculpt some land and paint it, see what effects you can and can’t achieve (on a personal level especially). Practice and play around. Zoom in and level yourself so you see how big it will be from a sims perspective. This should help you start to get a feel for the size of things in CAW. Don’t forget there’s a grid button there to help!
Don’t forget the things you can and cannot do from part one, which will also help you if you get stuck.
World Size Matters!
Pick out the size that best suits you. I was afraid of picking both the huge and small sizes so I picked medium. I soon found it was too small to do what I wanted, and had to do a lot of technical stuff to make my world work out on a larger map. It’s much better now though, so thanks for asking!
Hints for picking the right size:
- Lay some roads down, don’t be a perfectionist about it, it’s just to check the map out and you can always restart or delete them when you’re done.
- Lay the biggest lot you can. That’s pretty much the size of the two skyscraper lounges.
- Click the show grid button and zoom in. The squares will keep resizing to match the zoom. When they stop resizing, close to the ground, that’s about the same as the in game grid.
Once you’ve seen the size of these things you can make judgements about the size based on your plan. If you want a small world for example, I suggest upgrading to a medium and having more space. That will allow you to take advantage of expansion packs as they come out, and have room to move and grow.
Start Sculpting Your Masterpiece!
Once you’ve picked the perfect size you can begin sculpting. To give you a very quick rundown on the sculpting and painting process I use, I’m using a tiny flat map with 200 as max height.
 I always pick the flat maps because this gives me total control over the landscape.
The first thing I do is set the sea level. To do this I raise a small hill very quickly so I can select a spot on it (as it’s hard to do this without a hill). Having the sea level set allows me to sculpt land and see where water will appear at the same time. There’s no guesswork, and I can build the land up (as opposed to having to do both to get rid of the flatness) which makes things faster.
 I sculpt the land so that it matches or is close to my “map” idea. If you refer back, you will see I based it off my crappy drawing.
Don’t forget you can export and import height maps. Photoshop can be used to edit these to get the shape and height you want if you’re having trouble with the tools. You can always fix Photoshop mistakes in CAW later too, to smooth things out if you have a big square edge for example.
In fact, you could draw your whole world in a rough fashion and fix it completely in CAW later. Just remember that height maps use shades of black and white to show height. If you’re having major trouble, there are Photoshop brushes available that can create mountains which may help you out.
Time to Make Some Grass Stains and Do Some Roadwork!
Once you’re done sculpting you can start painting and laying roads. STOP! Do you want to share this world with others or play it? Do you want it to load or set fire to peoples computers to the sound of screaming graphics cards?
I hope you answered that you’d at least like it to load, because this is what you need to know about painting: You cannot use more than 8 paints per chunk boundary. A chunk boundary is basically the outline of the “chunk” of world which loads at one time. If you have MORE than 8 paints per chunk it will show up RED. It’s okay to have a couple, but they slow games down and should be avoided like the plague.

Above you can see a red chunk boundary on my world, caused by using 2 types of sand, dirt, grass, and rock, and then adding one type of weeds. When I remove the weeds by painting over them the chunk turns blue again. Sometimes, chunks turn red because of a tiny amount of paint, so it’s good to know that too. Make sure you keep track of the paint’s you use per chunk, and always check under the water (by adjusting the sea level). You can see the chunks in your world by going to View > Show Chunk Boundaries.
You can also use the eraser tool, turn visualize layers, and export paint layers to photoshop on to help you get the look and feel you want.
Now that you know about painting limitations, it’s time to get started! I recommend working on one area of your world at a time and completely painting it to perfection and laying the roads where you want to. Once you’ve done that you can start adding lots, either as you go or at the end. Ensure you’re completely finished painting before placing lots however, more on that later.
 When I paint I always have my falloff set to 0. It makes blending easier, and makes things smoother. I also have the opacity near 15 or 20 for dark colours, and up higher (anywhere from 25 to 50) for lighter colours. Having a low opacity also helps blending.
Using this method when covering large areas of ground leaves bare patches. I think these make the ground look more natural. Sometimes mistakes can make things better, and it’s better to try to paint quickly as opposed to slow and painstaking. Nature isnt perfect, and that’s exactly what makes it perfect.
When I paint I lay out a base colour, in this case semi transparent dark sand, and then I go over the “highlight” areas with the lighter version of the texture, light sand. Finally, I go back over the darker shadows and indents with the first texture, but with a higher opacity. That way it looks like I used three different colours because there are 3 different shades in the area.
 Where roads are concerned, I usually lay them before painting so I can use the road grading tool to smooth out the roads and re-sculpt where I need to without interrupting my paintwork.
If you’ve used Illustrator before you’ll recognise the anchors and handles, which can be used to bend roads and paths via the selection tool. Don’t forget you need intersections to connect roads together and at the end of every road. You can connect them by dragging the dark blue road anchor to the edge of the intersection.
 When you’re done laying roads and making sure they’re positioned properly you can smooth them out using the road grading tool. Make sure you’re smoothing connecting roads (unless you need to do single sections), and terrain smoothing is a very handy option to try out too.
Laying footpaths works the same way except you don’t need intersections on the ends, only when connecting multiple footpaths. You don’t have to connect them, and the game works fine with them disconnected, but you should never lay roads or footpaths over each other. Remember that there can only be one level of routing (which counts lots, so you can’t place lots, roads, and footpaths over each other).
Time to Call In Some Builders…
When I’m completely done painting an area I place lots. I wait until the painting is complete for the area (if not the whole world) because lots cannot be painted over, or rather they can but their CAW and game preview will always have the old colour which looks odd in game. Even if it’s not as drastic as being placed on grass and then having sand painted over it, it will look weird to have a green square in an area where the grass is spotty or multiple shades.
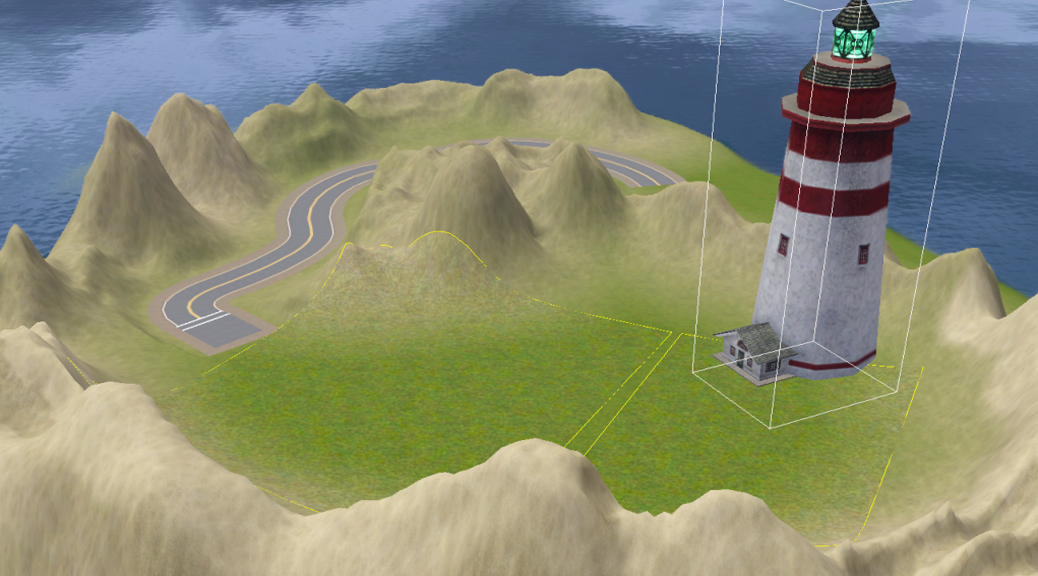
 When I’m done painting and placing lots I put in my decorative objects. In this case it’s a lighthouse, which I got from the environment objects in the metadata. I filtered the objects so I could find the right one quickly and double clicked it so I could place it.
 I’m completely done now, even though it was very quick and rough! You should put some more care into the creation of your world than I did for this tutorial, what I did was super quick so I could give examples :).
It’s not all that stunning. I didnt finish painting and I rushed it. My current world, Hunaki La, is much much better. If you’re creating a world right now, show me some screenshots!
Later in the year I’ll be going over some advanced techniques you can use in your world creation, such as making your own textures and rabbit holes. Keep an eye out!
If I had lots of time and money to spare and if that game ran on Linux I’d be inclined to purchase a copy and play around with it. Virtual reality and the creation of virtual worlds has been a passion of mine since I was a child.
I know there’s a Mac version :). Also, I think the base game costs $40-80, and the expansions are about $40 each :). It’s a lot of money but if you save for it….it just works out.
awesome guide. It’s not easy trying to work with CAW. it’s been the cause of more than a few headaches.